 Editing on Capcut is fun if you know what to do and how you can easily go about it. One of the ways to have smooth editing on Capcut is via Velocity editing. With Velocity editing on Capcut, you can speed up and slow down videos to create creativity and a kind of user attraction to the video. So, in this article, you will learn how to do velocity on capcut.
When doing velocity editing on Capcut you can easily choose where to upscale its timing and where to downscale its timing to create a scene that can easily be rewatched. A glimpse of velocity in Capcut is slow-mo on the editing app.
With much anticipation, we will consider how to do auto velocity on Capcut in step-by-step procedures in this article.
How to do Velocity on Capcut
There are just seven steps from start to finish to do velocity editing on Capcut. This cut across uploading and exporting your video with the velocity effect on the Capcut app.
Now, the following are the steps to do a velocity edit on Capcut.
- Open the Capcut app
- Import Video
- Choose the Velocity effect to speed up and down.
- Choose the Curve button.
- Edit the video velocity via the curve
- Save and Export.
Hence, we will analyze how you can follow the steps above to do velocity editing on your Capcut app.
Open Capcut
The first thing you’d want to do is to launch the Capcut app on your phone. If you have not downloaded it you need to download the app for your device depending on your apps store.
- Open the Capcut app on your phone.

- Click on “New Project.”

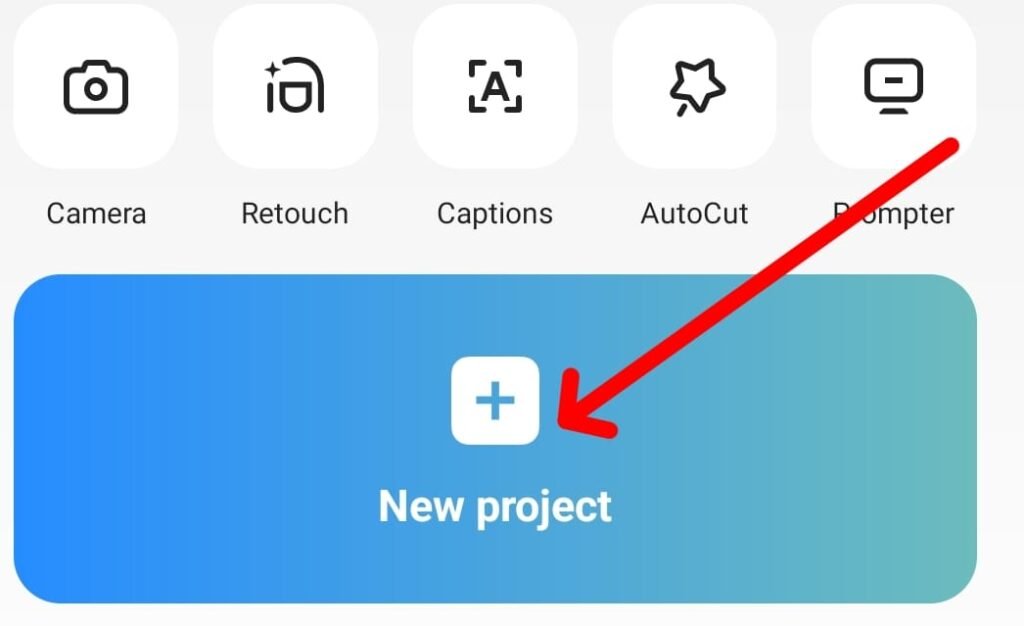
Now, you are ready to add your video for editing.
Import Video
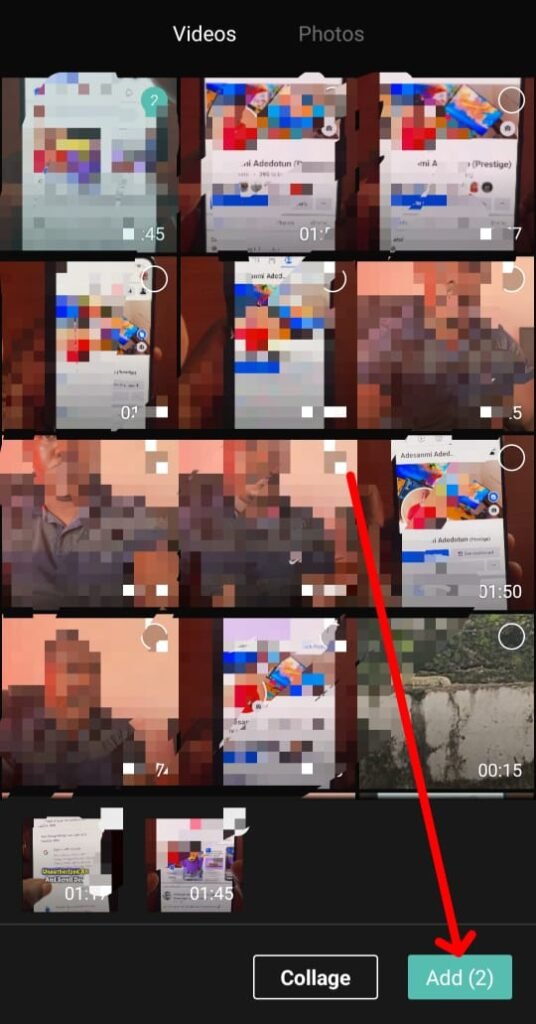
You need to add your video via your phone camera roll and select the video you want to add to your Capcut for editing.
- Once you clicked on “New Project.”
- Switch to “Gallery” and select the “Video” you want to add.
- Click on the “Add” button at the bottom right.

Once you have imported your video to your Capcut app your video will be ready for editing. As from the next headlines, you will learn in detail how to do velocity on Capcut.
Choose the Velocity effect to speed up and down.
While on your Capcut editing screen, you can add the velocity effect to your video by following the steps below.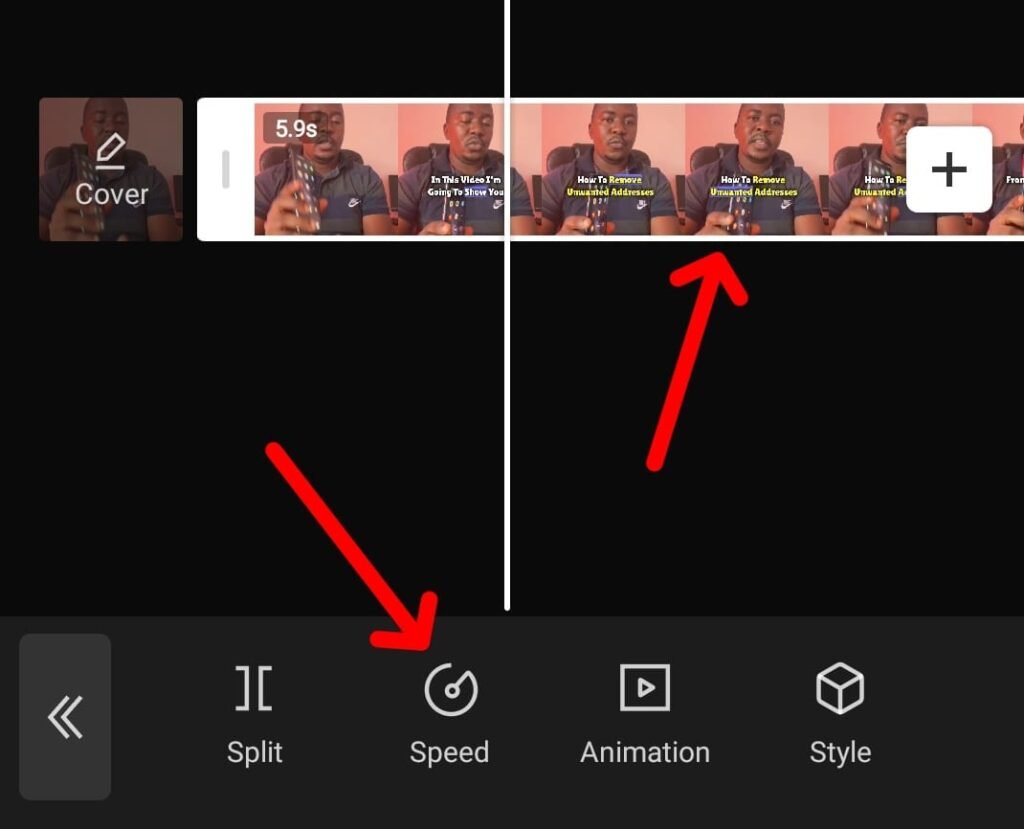
- Click on the “Video” on your timeline.
- Click on the “Speed” on the Capcut frames.
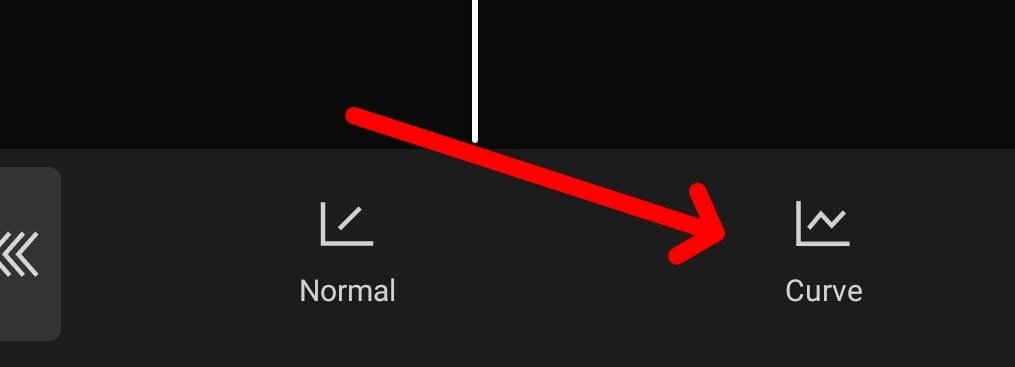
Choose the Curve button
Once you clicked on the speed button your video will move to the next stage. Now, to do velocity editing on the video, kindly follow the step below.
- Click on the “Curve” tab.

- The Capcut app will generate all available options. This includes
- Custom
- Montage
- Hero
- Bullet
- Jump Cut
- Flash In
- Flash Out
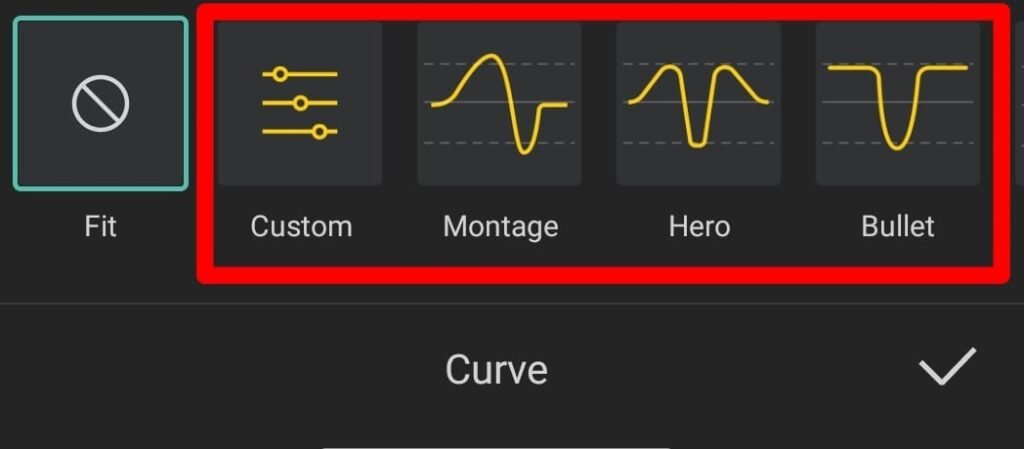
- You can use all the preset auto velocity features and you can choose the custom option to create your velocity for the video.
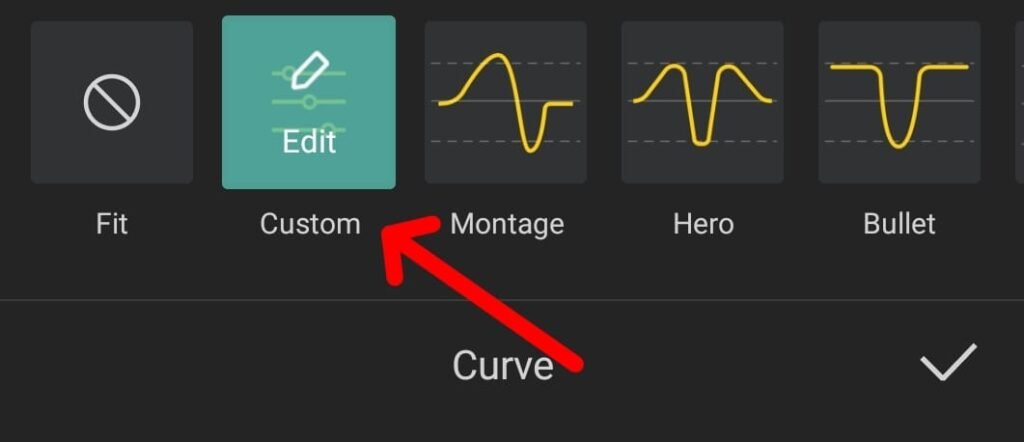
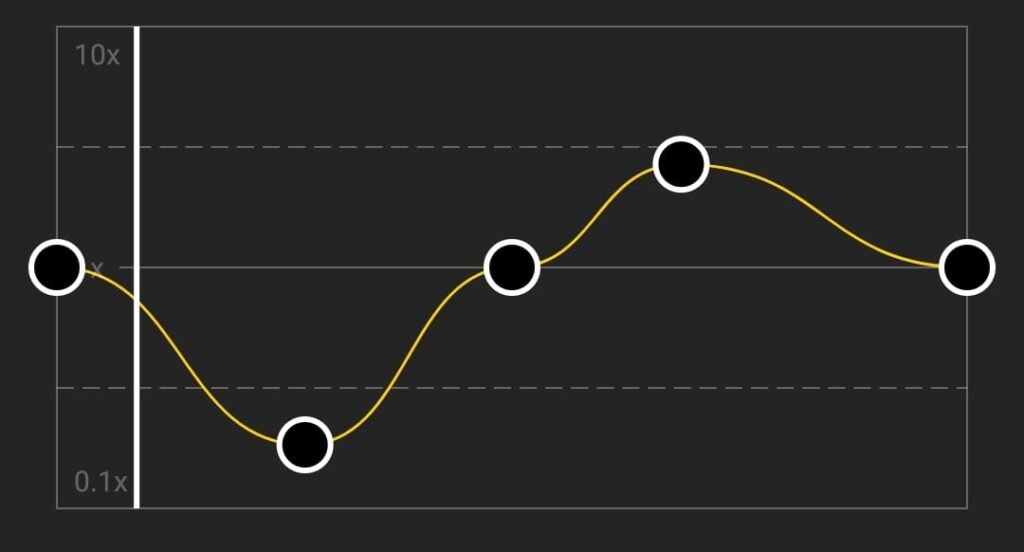
Edit the Video Velocity via the Curve
Now, we have different velocity options that are preset. However, to do a velocity editing on the video to meet your demand you need to choose the custom option. So, follow the steps below.
- Choose “Custom velocity.”

- Click on “Edit” on the custom velocity option.

- Drag the dots on the Capcut spectrogram.

- Adjust the beat placement.
- Adjust the speed of the video between 0.1x to 10x.
- To make it smoother click on “Make it Smoother” and choose between “Faster Process” and “Better Quality.”

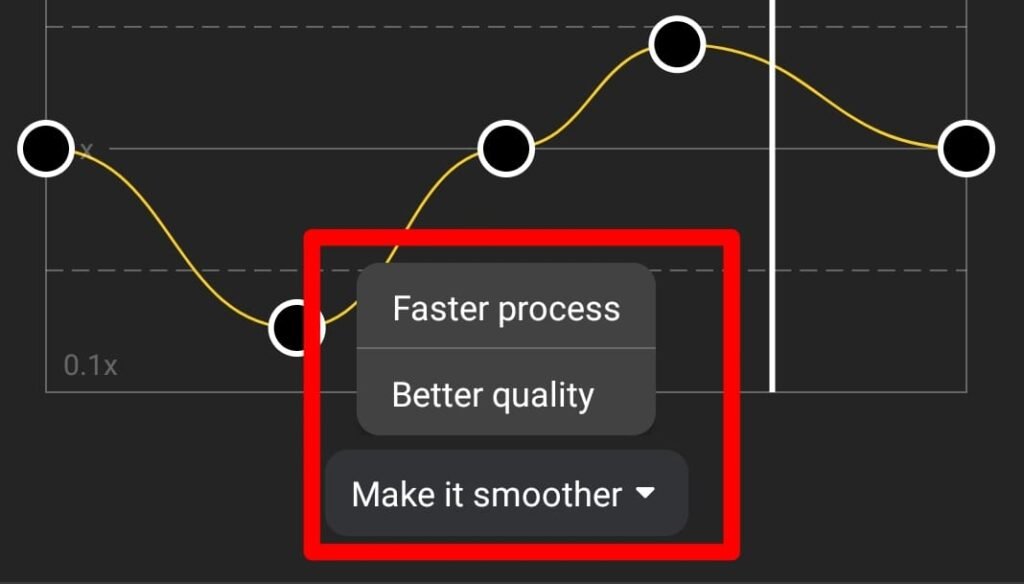
To add more beats to your Velocity editing option on the spectrogram you need to click on the “Add Beat” button and a new dot will be added. You can repeat this to add multiple beats to your video.
Save and Export
After you have edited and chosen your custom settings for your velocity editing, then, it’s time to save and export your video.
- Click on the “Check” icon at the bottom right to save your Velocity editing.
- You should see “Smooth slow motion applying” on the screen.

- Click on the “Arrow Up” to save and export your video.

- You can change the video resolution from 2k/4k to 1080p or 720p depending on your choice.


How to do Auto Velocity on Capcut
Auto velocity on Capcut is by far the fastest and easiest way to add beats to your video on the spectrogram without necessarily doing the job yourself. With the auto velocity feature on the Capcut app, you can easily match the speed of your video with your chosen song or track together. This will easily make your video more engaging and attract attention.
Therefore, by following the steps below you will learn how to do auto velocity on Capcut with a step-by-step process.
- First, update your Capcut app to the latest version if you want to use the auto velocity feature on the app.
- Open the “Capcut” app.
- Click on “New Project.”
- Choose the “Video” from your gallery.
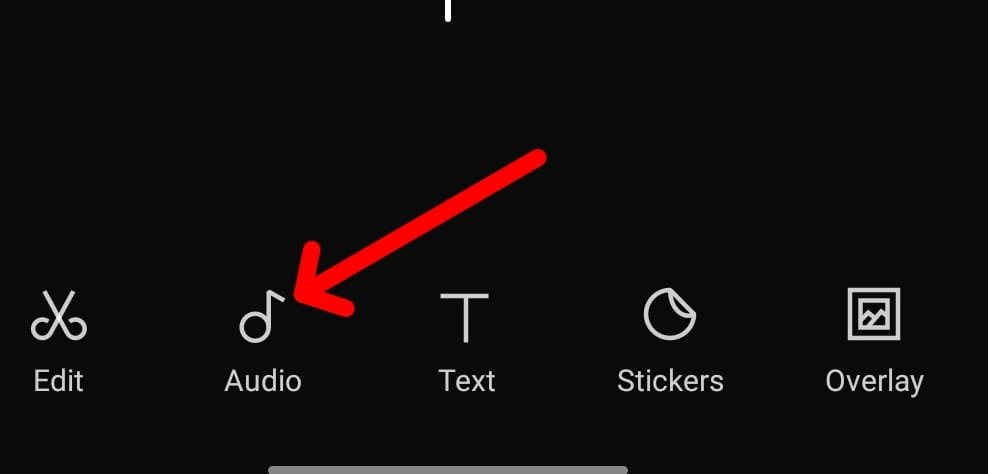
- Click on the “Audio” tab to add your favourite song or track.

- Trim both the video and song to the same time or duration.
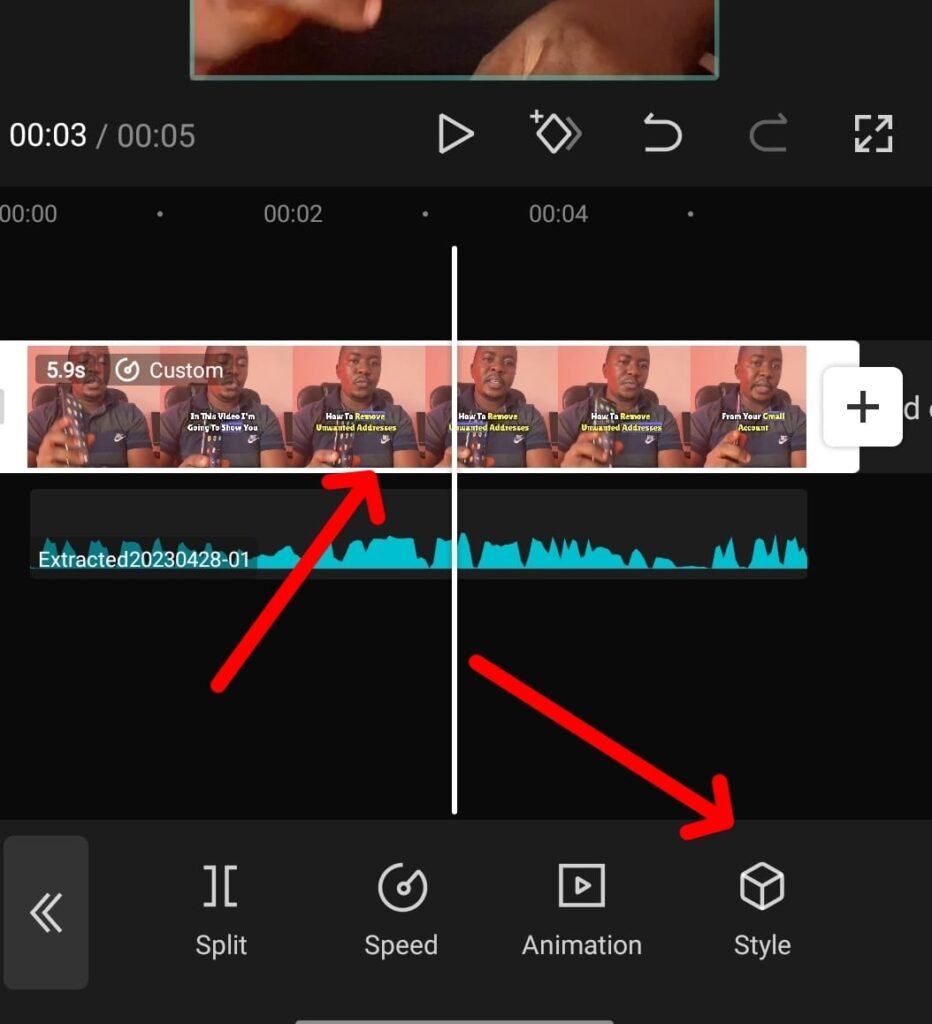
- Click on the “Video” clip above the “Audio”
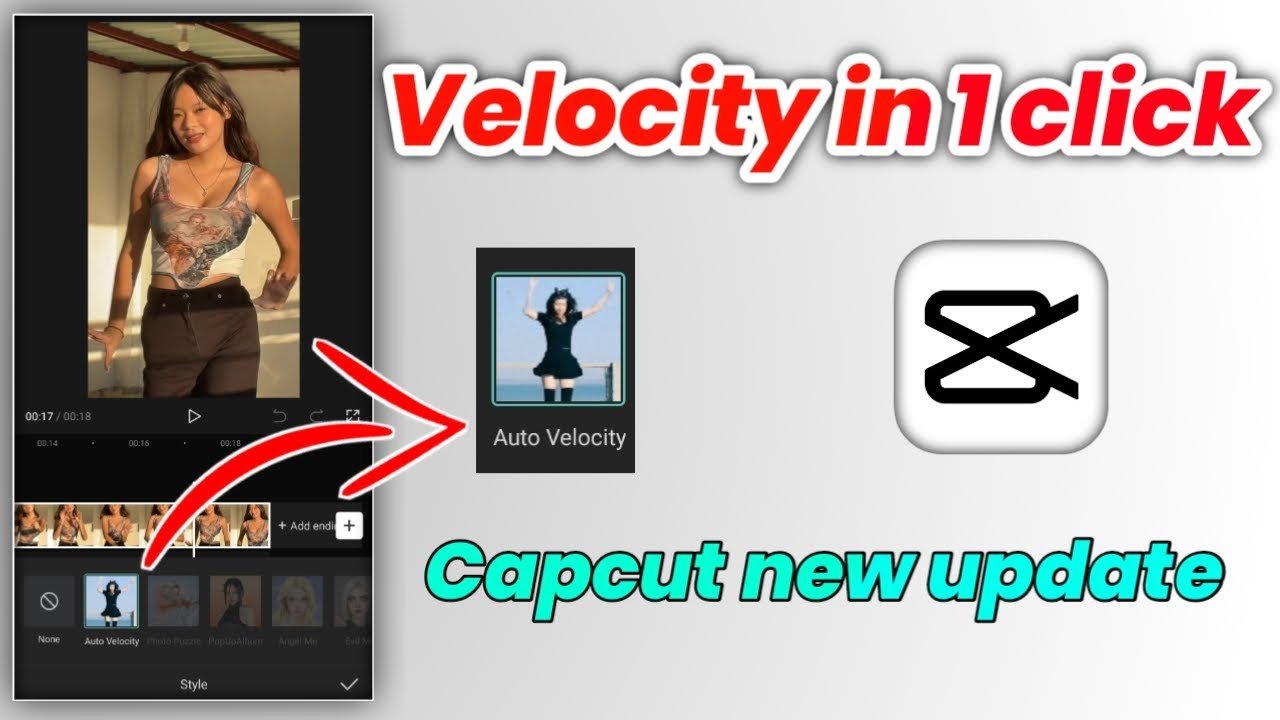
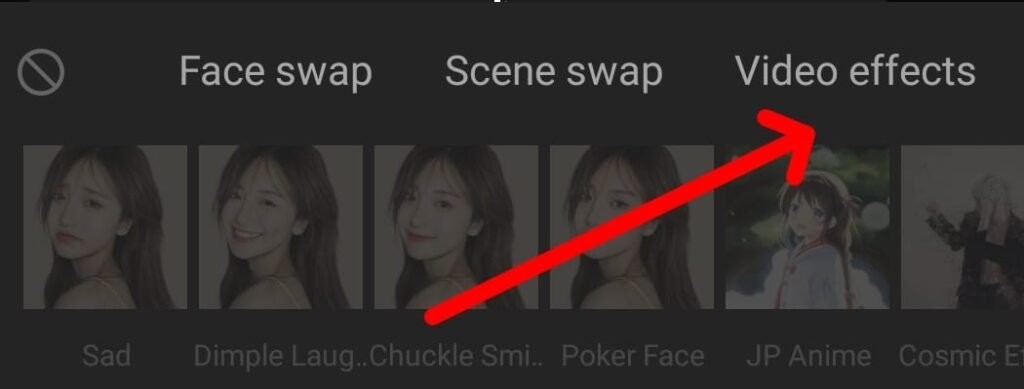
- Click on the “Style” option.

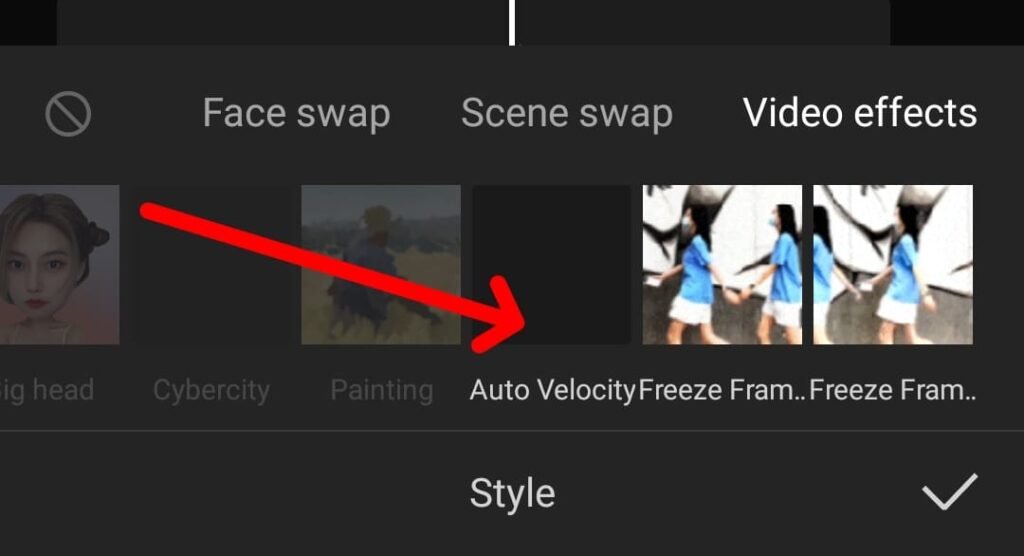
- Swipe to the left until you get to “Video Effects” and click on it.

- Click on “Auto Velocity.”

- You will “Generating” on the video screen with the auto velocity generating to match your video and the selected audio.
Once you can confirm that the auto velocity feature has been applied perfectly then you want to export your video.
With this guide, you’d learn how to do velocity editing on Capcut and how to do auto velocity on the Capcut app as well. However, if there is a step you get lost kindly leave a comment below.